Moss Lawns – the Green Alternative?

Moss Lawns – the Green Alternative?

As concerns about drought continue to rise, many people are looking for drought tolerant alternatives to grass lawns or looking for plants that can tolerate growing under trees where grass will not grow.  If you have trees that provide shade you probably have a great site for mosses!

There are 153 species of mosses found in Montana and while not all of them are appropriate for use as lawn substitutes, many are! We tend to think of mosses as delicate and needing very moist conditions but mosses are surprisingly drought tolerant and take very little maintenance once established.

Why would I want a moss lawn?

  • year-round color
  • adds beautiful texture to shady spots
  • does well with most shade-loving shrubs and deciduous trees (especially maples) 
  • good for erosion control
  • helps retain moisture and nutrients in the soil
  • very low maintenance once established – takes care of itself – you just keep the leaves and needles off of it
  • no need for noisy, polluting lawn mowers

Is my yard a good candidate for a moss lawn?  Yes if you have:

  • soil: mosses are very adaptable to most soils including compacted soils, clay and compost; some aren’t too happy in sand but others tolerate it
  • shade: although a few species are sun-loving, most mosses prefer shade – partial to full shade

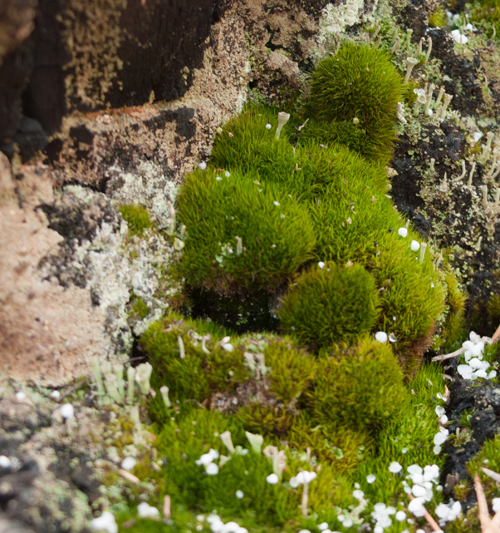
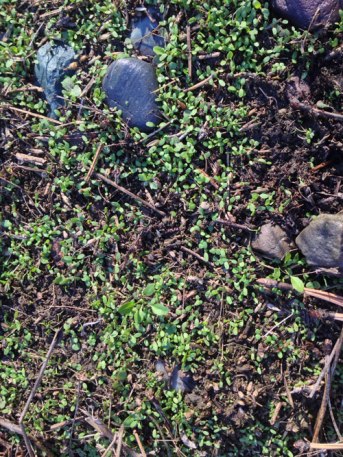
moss grows everywhere

Isn’t it too hot and dry?

Start looking around where you live, you will probably be surprised to find mosses growing not too far away. They are one of Earth’s oldest types of plants for a reason – they are very adaptable. Mosses need water droplets to reproduce and spread, but they can live for long periods of time without water – they are tough! 

While mosses tolerate periods of drought they prefer some moisture.  So is it too hot and dry where you live – probably not if you can give them shade and some supplemental water.

Will moss tolerate traffic?

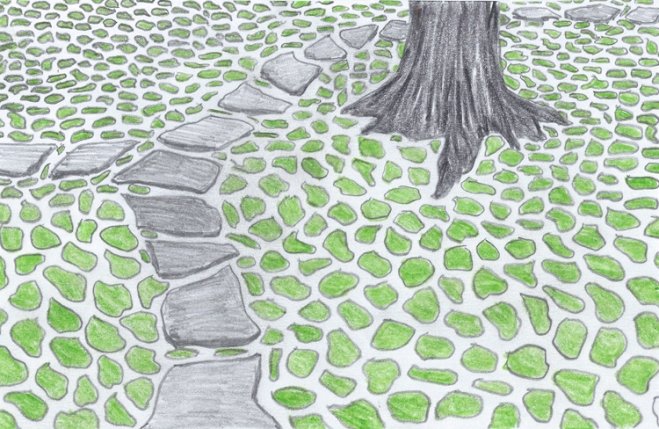
  • yes, and it actually benefits from some foot traffic once established; in the early stages avoid walking on it and use stepping-stones or a walkway
  • does not like quick stops and skids that break the stems – not good for the kid’s running games
  • probably not too useful where the dog creates a path running along the fence

How big an area should I start with?

With most plantings I suggest starting with a small manageable area, but because moss is so slow-growing I recommend selecting an area as large as you can keep regularly watered (ie moist) for several months.

What is the best place for moss?

  • shady places –  a few moss species like full sun, but not most
  • sites with light traffic – no quick stops and running and no dog paths
  • under trees

How do I prepare the soil?

Mosses aren’t too fussy about soils, but they thrive where soils are a bit acidic (pH 5.5).  A simple soil test can tell you if your soils may need some amendments to reduce alkalinity or acidity.  If your soil’s pH is higher than 5.5 lower it with skimmed milk powder, powdered sulfur, or rhododendron fertilizer. Be sure to lightly water in any powdered amendments.

Soil preparation includes clearing the soil of weeds, grass, conifer needles and leaves where you want the moss to grow. If you prefer a smooth, flat moss lawn take time to level the area, otherwise leave bumps and lumps to become part of the picture.

Water your soil well prior to planting.

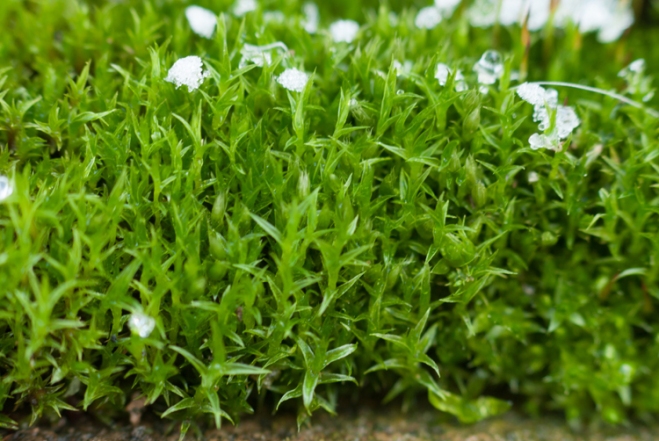
Pleurocarpous moss

Pleurocarpous moss

What kind of moss is best?

There are two general types of moss: Pleurocarpous and Acrocarpous. Consider using a mixture of both types and even mixing mosses of different colors.

Pleurocarpous type mosses spread horizontally over the ground and tend to grow quickly and constantly making them desirable for carpeting.

Examples:

  • Fern moss (Thuidium delicatulum)
  • Erect-Fruited Iris-Moss (Distichium capillaceum)
  • Juniper Haircap-Moss (Polytrichum juniperinum)
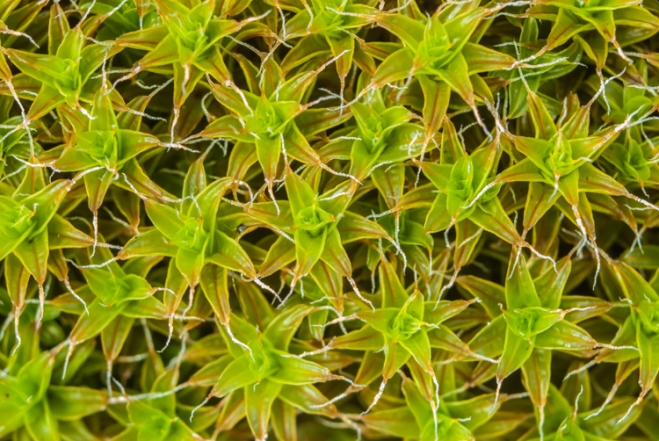
Acrocarpous moss

Acrocarpous moss

Acrocarpous type mosses tend to grow in clumps that develop before it spreads horizontally. They are slower growing and need to dry out periodically and thus are more drought tolerant than Pleurocarps.

Examples:

  • Fire Moss (Ceratodon purpureus)
  • Bottle Moss (Amphidium lapponicum)
  • Broom Moss, Rock Cap Moss, Windswept Moss (Dicanum scoparium)

Where do I get moss?

There are suppliers on the Internet and perhaps your local nurseries supply mosses.

I prefer suppliers that use moss as live plants rather than those that collect moss and dry it for ornamental purposes.

Collecting moss from your own property is the ideal solution.  It not only is a free source but also indicates that mosses are happy in your environment and you will have the best chance of success.

Whether you collect from your own property or get permission to harvest from someone else, collect no more than 30% of existing plants to avoid killing existing populations. After harvesting cover exposed areas with leaf debris so new moss can move in and cover the area – usually within a year or two.

How to gather moss

Mosses can be successfully transplanted anytime of the year.

Mosses (members of the phylum Bryophyta) lack conventional roots, stems, and leaves and grow as carpets of tiny plants that easily separate from their substrate.  To harvest, gently pry up pieces of moss using a hori-hori knife or trowel – something with a long blade. Pieces should be about 6” in diameter to keep it from drying out too quickly. Keep some soil intact with the moss.

Transport mosses in seed trays or box flats to minimize disruption of soil and rhizoids.  Watering is not necessary but is it is a good idea if the mosses will be uprooted for more than a few hours.

How do I plant moss?

Before planting lightly scratch the soil surface and water thoroughly.

To plant moss gently but firmly press down the moss pieces make good contact with the soil; water thoroughly.  Water thoroughly to wet the top inch of soil and then press firmly again, re-compacting the moss into the surface.  Secure moss onto rocks and uneven patches to keep moss from moving out-of-place.  Plant staples can be used to secure recalcitrant pieces.  If you have squirrel issues you may want to place netting over the planting.

To make a little moss go a bit further, place the moss sods at spaced intervals. Over time the sods will grow together to form one continuous patch of green.

spreading out moss pieces

spreading out moss pieces

How does moss grow?

If you have seen mosses, you know that they are actually carpets of individual plants. They are rarely taller than one inch high.

Mosses require water to reproduce. While all plants need water, mosses need droplets of water to enable reproduction.

Caring for your moss

Water the fragments 1 to 4 times a day for the first week depending on the conditions and occasionally walk on them to keep their contact with the soil. The best time of day to water is early in the morning.  Avoid watering your mosses close to dusk.

A sprinkler head or hose with a very fine nozzle that mists the moss is much better than direct water pressure which may damage the plants. If the moss begins to appear dark green or patchy over time, it is likely receiving too much water.

moss stars

Watering schedule:

  • month 1-2 – daily to increase growth and keep moss in place
  • month 3 – every three days
  • month 4 – once a week
  • month 5 – twice a month until area is completely covered with moss
  • month 6 – 12 water if ground’s surface dries out or if there has been no rain for three weeks or more.

Transplanted mosses usually need watering even into the winter months during the first year of establishment. Mosses will survive periods of drought once they are established but it is important for establishment, growth and reproduction that they remain moist for the first 6 months to a year.

Anyone who has tried started a moss lawn knows mosses are grow quite slowly. Most people understand this, but many don’t understand just how slow is slow.  Be patient!  It may take up to several growing seasons for moss to completely fill in an area.  How beautiful when it’s fully matured!

Once moss is established keep the area tidy. Remove leaves and needles.  If weeds or grass and creates the least disturbance for your moss. The moss will do the rest.  Moss spores are borne on the wind and will settle in on their own and take hold. come up remove them immediately.  Tackling them systematically makes management doable.

Can you really reproduce moss by putting it in the blender with buttermilk or beer?

Recently there have been numerous articles and TV shows about creating moss gardens by putting moss in a food blender and creating a slurry that can be painted wherever you want moss to grow.

Here’s one recipe:

moss milkshake

Fill an old blender with a large piece of moss (dead or alive), two cups of buttermilk (or beer), and two cups of water.  Blend the mixture until it has the consistency of a traditional milkshake.

Spread your milkshake. Coat your desired objects/garden plot with the moss milkshake. You can pour it directly onto things, use a paintbrush, or a spray bottle (?) to get it spread out. Although not as visually appealing, you can spread this mixture onto the ground rather than planting live bits of moss. This slurry must be kept moist for several months.

Although this may work, the best way to grow moss is by division of a colony or fragmentation, buttermilk is not needed (‘though maybe a beer is.)

If a moss lawn seems like too big a project, there are lots of other ways to use it!  Have fun!

what else you can do!

Mud Maiden
Lost Gardens of Heligan, Cornwall, England
http://www.heligan.com

Plant of the week – Curl-leaf Mountain Mahogany

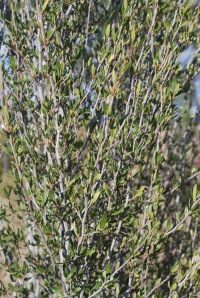
multiple grey barked stems with small, elliptical green leaves

grey bark of young branches

I just love Curl-Leaf Mountain Mahogany (Cercocarpus ledifolius) and it is way under-utilized in landscaping!

This xeric shrub – actually more like an architecturally diverse tree when it is happy – survives drought with aplomb and thrives in rocky, poor soils as well as loamy soils.  It is just fine with extreme temperature ranges so it is great if you have a hot, dry spot but it doesn’t mind wind and cold.  Mature plants may reach 30′ in height and are very long lived.  Supposedly one was known to be 1350 years old and succumbed only to a saw.

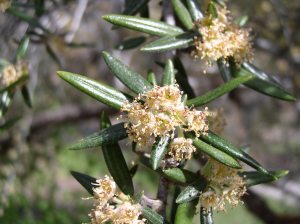
green narrow leaves surround cluster of small yellowish flowers

flowers

Often found on rocky slopes throughout the Western US, it is browsed by a variety of mammals (including cottontails and deer.)  When browsed it becomes bushy and thick but it’s natural habit is upright and slender when young, creating a large multi-branched canopy when mature.

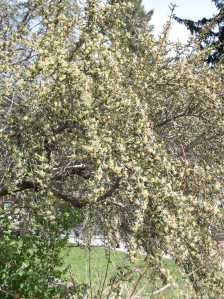
Curl-leaf Mountain Mahogany’s beautiful light grey bark is a terrific background for it’s dark green leaves, which though narrow, elliptical, curved (hence the common name) and rather leathery, are evergreen!  Clusters of yellow-orange trumpet-like flowers cover the branches in early summer.

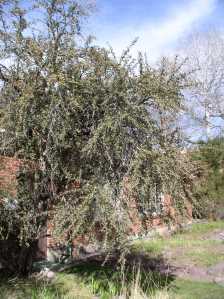
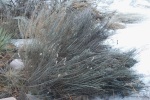
many branched large shrub

Curl-leaf Mountain Mahogany shrub

Slender, tapered achenes (seeds) approximately 1/2″ in length have two inch long, curled, wispy awns that make the shrub look like it has curly hair.  Seed production is quite variable depending on the climactic conditions of various years.

This beautiful member of Rose (Rosaceae) family is useful as a focal point of a large garden space or in a landscape setting that calls for a plant with visual movement and interest.  It’s hardy, needs little care and provides green color all year long.

flowering branches of Curl-leaf Mountain Mahogany

flowering branches of Curl-leaf Mountain Mahogany

A Plant in a Pot is Not the Same as a Plant in the Ground!

Plants in pots are not as winter hardy as plants in the ground – we all know that – and most of us have lost our share of plants we had hoped would make it through the winter in a pot.

large thimbleberry in tan pot

Thimbleberry in a pot

Often the issue is not winter freezing, but the thaw-freeze cycle of spring.  Native plants expect to freeze, but they also expect to have their roots nestled in soil that maintains warmer and more consistent temperatures than above ground.  Plants in pots are exposed to the dramatic changes in temperature often suffering root damage as they warm in springtime sunshine followed by freezing at night.

so… how to get potted plants to survive:

Avoid dark-colored pots that heat up quickly in the sun.  Unfortunately for those of us in the nursery business who use black plastic pots (used to keep roots dark during the growing season), avoiding using dark pots is not realistic.

A second option is to nestle pots in an insulating material that prevents sunlight from hitting the pot and keeps temperatures more consistent.  This may be accomplished with compost, straw, pine needles or whatever mulch material you use.

Third, consider moving pots to a shaded spot where sunshine won’t hit the pot in spring.  This helps moderate temperature fluctuations.

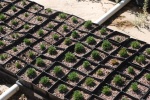
Stonecrop seedlings in pots

Stonecrop in pots

Other tips:

  • Make sure pots have adequate drainage to minimize how much time the plants roots are sitting in water as the pot thaws in the spring.  Roots drown if sitting in water for more than a week or so.
  • Avoid overwintering in unglazed clay pots that crack as water in them freezes and thaws.

Most native species winter nicely in protected pots.  We’re experimenting with planters and have been pleased with the overwintering results.  Tell us about your experience with overwintering in pots!

It’s time to prune!

dense blue-green foliage of Rubber Rabbitbrush needs pruning!

Rubber Rabbitbrush needs pruning!

This week we’re pruning the shrubs in our demonstration gardens as the snow melts off but before leaves emerge (yes, we still have snow!).

Pruning

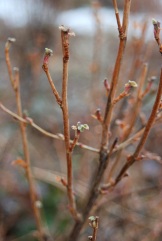
orange branches of wax currant with small leaves beginning to emerge

Wax Currant beginning to bud

Pruning maintains the health and vigor of plants by removing dead, diseased or injured material and allows  control of the shape of the plant while promoting fruit and flower yield by concentrating the plant’s energy.

This Rubber Rabbitbrush (Ericameria nauseosus) needs a heavy annual pruning to keep it bushy and under control.   It seems like the more I chop it back, the more vigorous it gets!  Other species like this Wax Currant (Ribes cereum) and our Blue Rock Clematis (Clematis occidentalis) need more careful pruning.

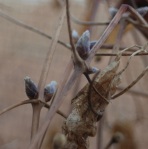
purplish buds of Blue Rock Clematis on branches of vine

Leaf buds on Blue Rock Clematis

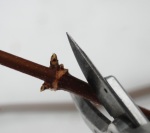
We use very sharp, clean pruning shears on smaller plants and pruning saws on large trees.   Our pruners have been sharpened and bleached in a 10% bleach solution.  It’s important to maintain sanitation and avoid transporting bacteria or viruses on shears.

We prune using the concept of ‘apical dominance’ which means that the plant has a propensity to have one main leader with all the other branches lower than the ‘main’ branch.  Cuts are made just above buds that are pointed in the direction we want the branch to take.  Our goal is to keep plants appropriately shaped (each species has its own form) and to help keep shrubs in the demonstration beds compact.

When to prune:

  • Trees and shrubs – ideally after buds swell and before leaves emerge so sap will seal cuts (fall pruning may open the
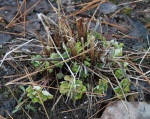
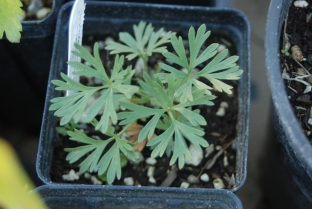
    new leaves of columbine emerge between old plant stalks

    emerging leaves of Columbine

    plant to disease since no sap is running to seal cuts) but light pruning may be done any time of year

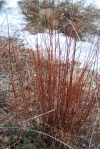
  • Grasses may be pruned either after flowering to prevent reseeding or in the fall if you don’t want them for winter interest in your garden.  If you wait until spring (like we have done), prune back as far as you can without damaging new growth.
  • Wildflowers may be deadheaded after flowering to promote second blooms or to minimize reseeding, but leave at least half of the plant mass so the plant can accumulate sugar reserves it needs to make it through the winter.  Some flowers like this Blue Columbine (Aquilegia coerulea) need to have old growth removed to make way for regrowth in the spring.
dense cluster of dozens of orange stems of Mockorange shrub

This Mockorange needs to be thinned!

This Mockorange (Philadelpus lewisii) shrub  needs to be thinned out to promote fewer healthy branches rather than lots of spindly suckers.

And of course, pruning provides cuttings for vegetative propagation which is a subject for another blog another day.

pruning shears cutting a branch of Blue Elderberry just below leaf bud

Pruning Blue Elderberry

Seeds vs plants – which is better?

square black pot with young seedling of Candle Anemone

Candle Anemone

It’s that time of year when seed catalogues tantalize
us with colorful pictures and inspire us to create
lists of all the plants we want to add to our garden
this coming summer.   There are companies selling
native plant seeds as well as potted seedlings.
Which is better?

cluster of brown furry seeds from Candle Anemone

Candle Anemone seeds

There are several factors to consider:

  • seed/plant source – finding seed or plants that are genetically close to the native plants around you is important both for ensuring plants are happy in your environment and to prevent weedy species from being introduced to your area
  • cost – seeds are definitely the cheaper route
  • speed of growth – plants win out here – if you want instant gratification go with plants.  Seeds often take a year or two to get established, and sometimes even longer to bloom.  Also some seeds will refuse to germinate unless climactic conditions are favorable for success and they may sit in the ground ungerminated until that happens.
  • amount of care – again plants have this one.  Unless you plant in the fall, seeds often require periods of cold stratification (usually 30-90 days) and constant monitoring and watering for several weeks after planting.   Plants on the other hand need regular (but not constant) watering for several weeks.

So the decision depends on your goals and your budget.  If you can afford it – go with plants.  They fill in quickly, establish easily and take less care.

Check out http://www.blackfootnativeplants.com for plant suggestions.  The website is undergoing a total overhaul but we expect to have the new site up before March 1.

If you are looking for a source of native plant seed near Missoula, check out Native Ideals Seed Co. in Arlee.

MNPS Garden Awards

garden bed with clarkia, blue columbine and yellow columbine

Native Garden

Do you have a native plant garden you are proud of and would like to share?
The Montana Native Plant Society has recently launched its new ‘Garden Awards’ program to recognize outstanding native plants gardens in Montana.  Here is a link to more information about the program and an application form.

http://www.mtnativeplants.org/Native_Plant_Landscaping

Are you starting to plan this year’s gardening activity?

Check out the Native Plants Gardening class offered by the Lifelong Learning Center on Thursdays Apr 12-May 17 6:00p.m. – 8:00p.m. for information on designing and planting a native plant garden.